Posted by Support Staff on 1st May 2018
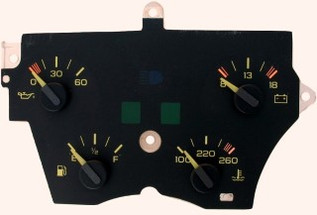
1990-92 Camaro Gauge Testing - Oil Pressure Gauge, Fuel Gauge, Coolant Temperature Gauge, Voltage Gauge

When a gauge stops working, it is sometimes hard to know if it is the gauge that is not working, or a sending unit failed, or some other wiring problem is the cause.
Testing a gauge to see it it is dead, is usually a simple process if you have the knowledge, and sometimes the proper electronics. Fortunately testing the Oil Pressure Gauge, Fuel Gauge, Coolant Temperature Gauge, Voltage Gauge, on the 1990-92 Camaro is simple and there is no special tools needed.
For this testing the Oil Pressure, Fuel, Coolant Temperature, and Voltage gauge cluster will need to be removed from the main gauge cluster. This can be done without removing the main gauge cluster from the dash. The front trim around the main cluster needs to be removed, and them the cluster covers.The center gauge cluster then needs to be unbolted and carefully removed. It is not unusual for the cluster to want to stick to the casing. Carefully work it loose to remove it.
To test the gauges, you will need a 12 volt DC power supply, like a car battery. Even a 9 volt battery can work if you want to keep the testing to the work bench and you don't have a nearby 12 volt battery. You will also need three jumper wires.
The three jumper wires will be used to supply (+) positive, (-) negative, and (S) signal or sending unit reference voltage.
Using the photos below as a guide do the following:
(1) Connect the jumper between the Battery (+) positive terminal and the Gauge (+) positive terminal.
(2) Connect the jumper between the Battery (-) negative terminal and the Gauge (-) terminal terminal.
The Gauge should start to have some movement. That is it for testing the voltage gauge. Now to continue the testing of the Oil Pressure Gauge, Fuel Gauge, Coolant Temperature Gauge, proceed to step 3
(3) Connect the jumper wire between Battery (-) negative terminal and the Gauge's (S) signal terminal. The gauge should start to move to the low position.
In the photos below - (+) represents the (+) positive connection, (-) represents the (-) negative terminal, (S) represents the signal or sending unit terminal. (Note: The Gauge terminal not marked are not used)


